A cloud service by Apple, iCloud allows you to store contacts, files and more. With iCloud, you can view, edit and even export contacts. However, it can only export contacts to vCard. What if you want to export them to a CSV (comma-separated values) file? This article shows you how to export iCloud contacts to CSV in easy ways on Mac and Windows.
 Cisdem ContactsMate
 Free Download
Mac users can use Cisdem ContactsMate to quickly export contacts from iCloud to CSV.
While several other contacts management apps offer this feature, I recommend ContactsMate because, after testing multiple options, it stands out in the following ways:
Below are the steps to export contacts from iCloud to CSV.
1. Download and install ContactsMate.
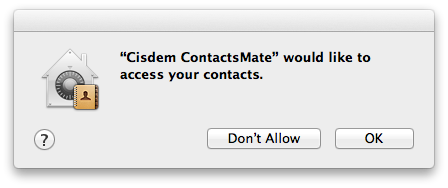
2. When you open it for the first time, click OK to allow access.
3. Click Add Account in the toolbar.
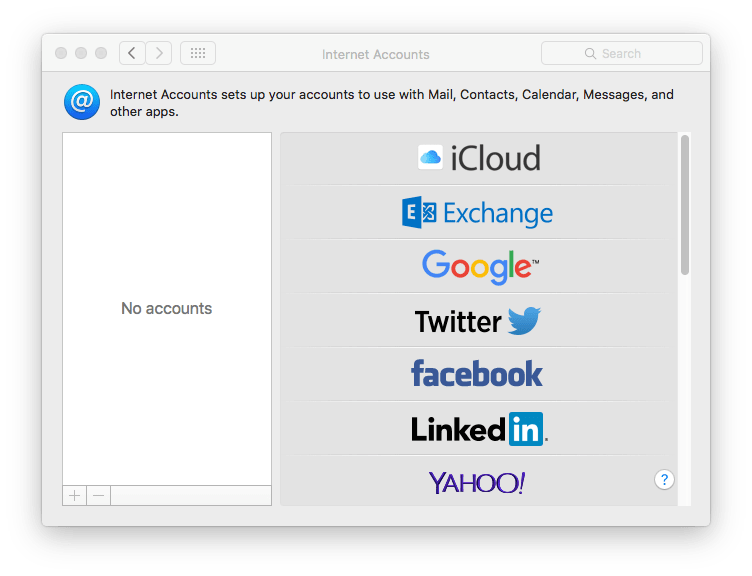
4. In the Internet Accounts window, choose iCloud and sign in to it.
5. Select the Contacts checkbox.
.png)
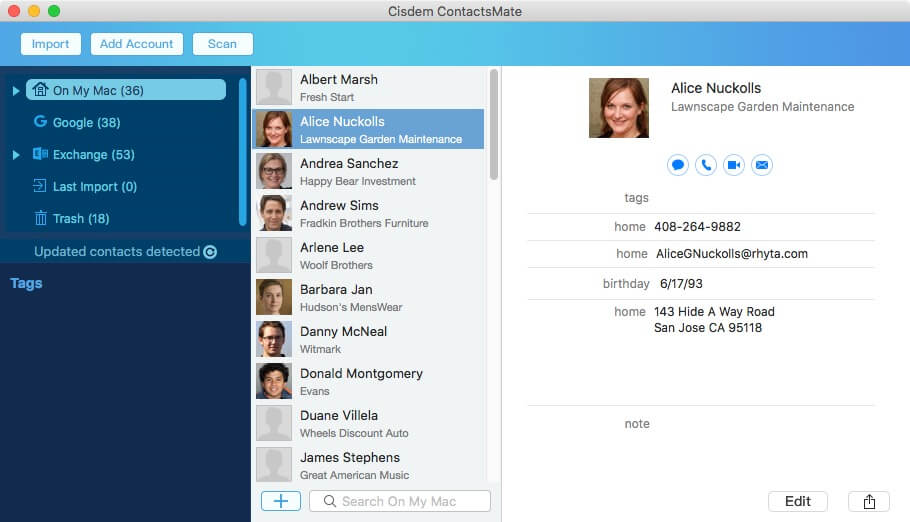
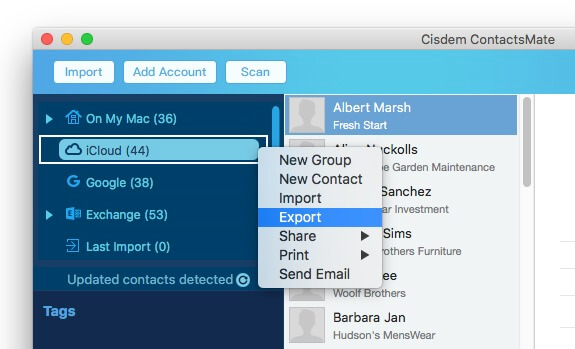
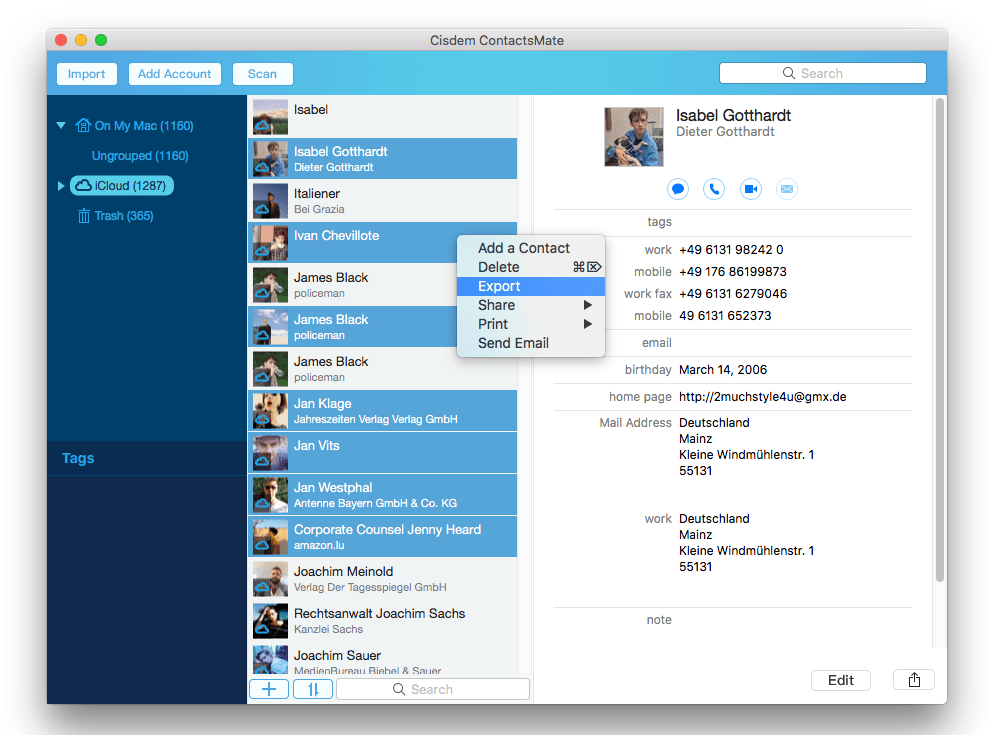
6. Click the  icon next to Updated contacts detected, and iCloud will appear in the sidebar. Control-click iCloud and choose Export.
7. To export iCloud contacts to CSV, click the Format dropdown list and choose CSV. Click Save.

If your purpose is to export iCloud contacts to Outlook, choose CSV (Outlook) instead. If you want to export iCloud contacts to Excel, choose Excel instead.
Also, there are two options to customize the export. For example, you can choose to put the first name and last name in one column or in separate columns.
Now your iCloud contacts are successfully exported to a CSV file.
Tip 1. Export selected contacts from iCloud to CSV
The 7 steps above show you how to export all iCloud contacts to CSV. This tip is about how to export selected contacts. In step 6, click iCloud in the sidebar. Select the specific iCloud contacts that you want to export. Perform a control-click and choose Export.
Tip 2. Export iPhone contacts to CSV
Sync iPhone contacts to iCloud first and then follow the steps above to complete the export. For details, please check out this guide.
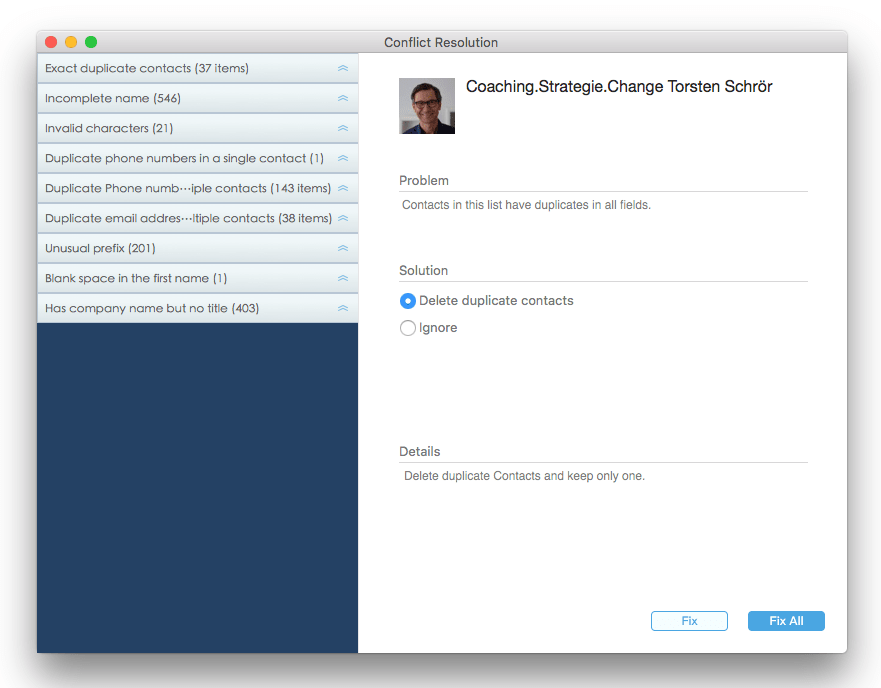
Tip 3. Remove duplicate contacts in iCloud contacts list before exporting
If there are duplicate contacts in your iCloud contacts list, they will appear in the exported CSV file. It will take time to find and get rid of them. To avoid this, you can use ContactsMate to remove duplicate contacts before the export process.
Mac users can also do the export with the help of the Contacts app and the Numbers app on your Mac. Numbers is a spreadsheet application created by Apple and is available for macOS 14.0 or later. It is preinstalled on some Mac computers. You can download it from the App Store too.
While this method is less feature-rich compared to using the professional contacts manager in Method 1, it can still get the job done if you prefer using built-in apps.
Follow the below steps to export iCloud contacts to CSV using these 2 Apple apps:
1. Open the Contacts app on Mac.
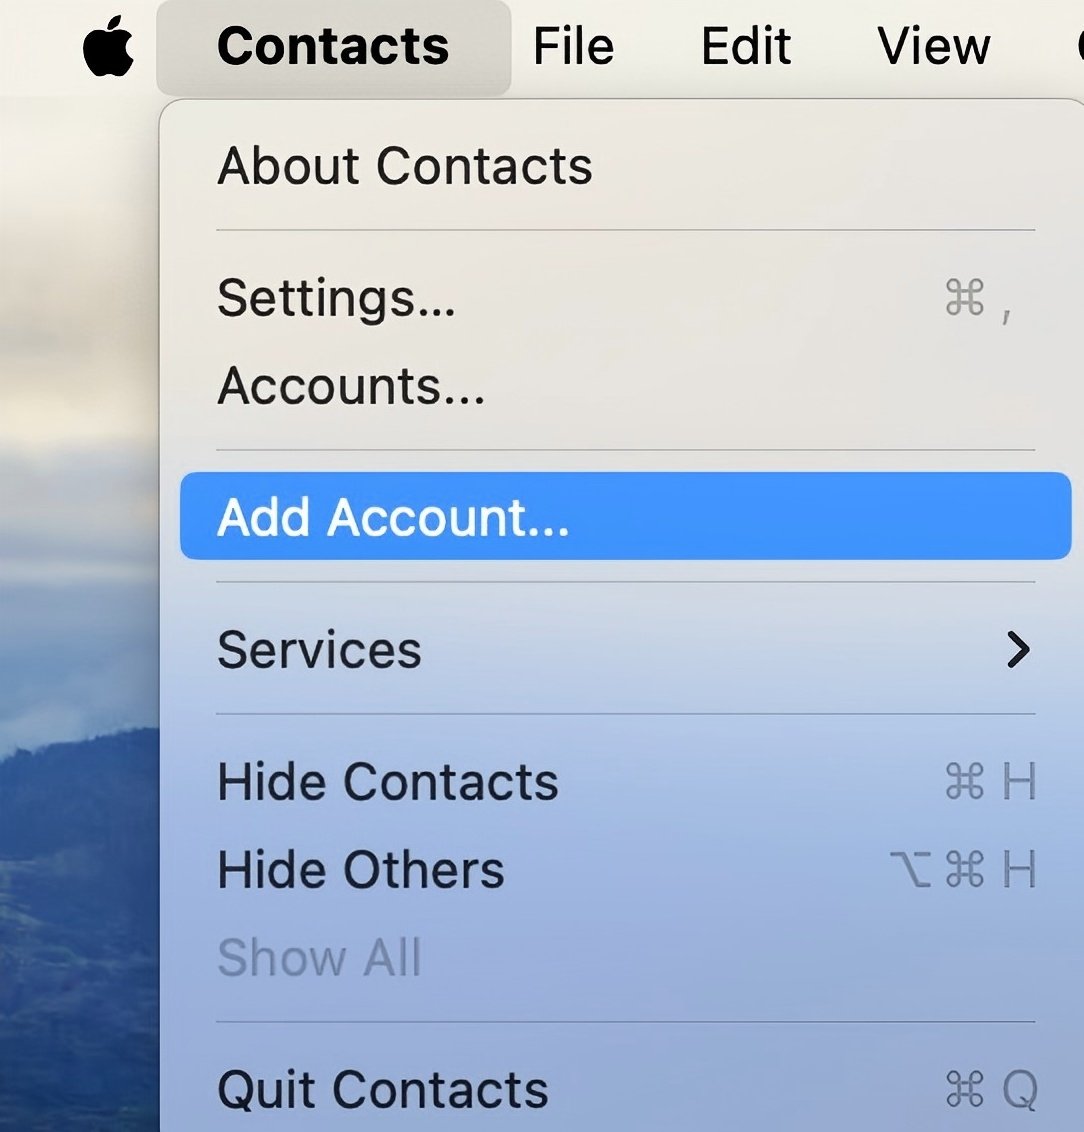
2. If your iCloud account hasn’t been added yet, click the Contacts menu in the upper left corner of the screen. Choose Add Account.
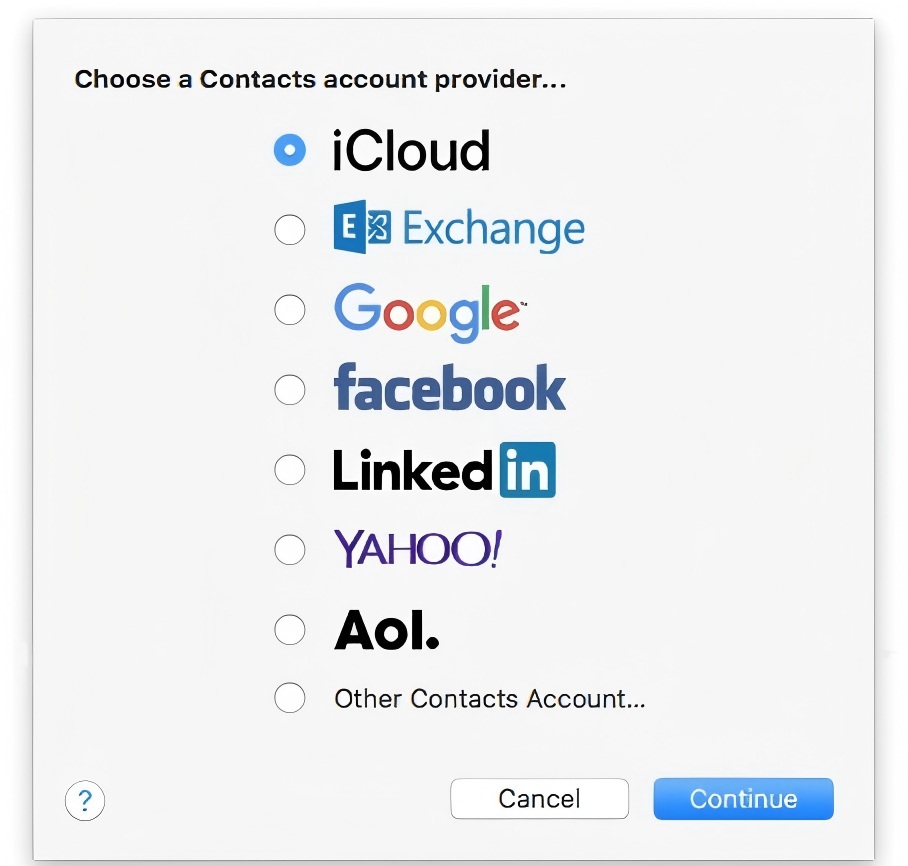
3. Select iCloud. Click Continue.
4. Sign in with your Apple ID. Click Next.
5. On the next window, enter your password. Click Next.
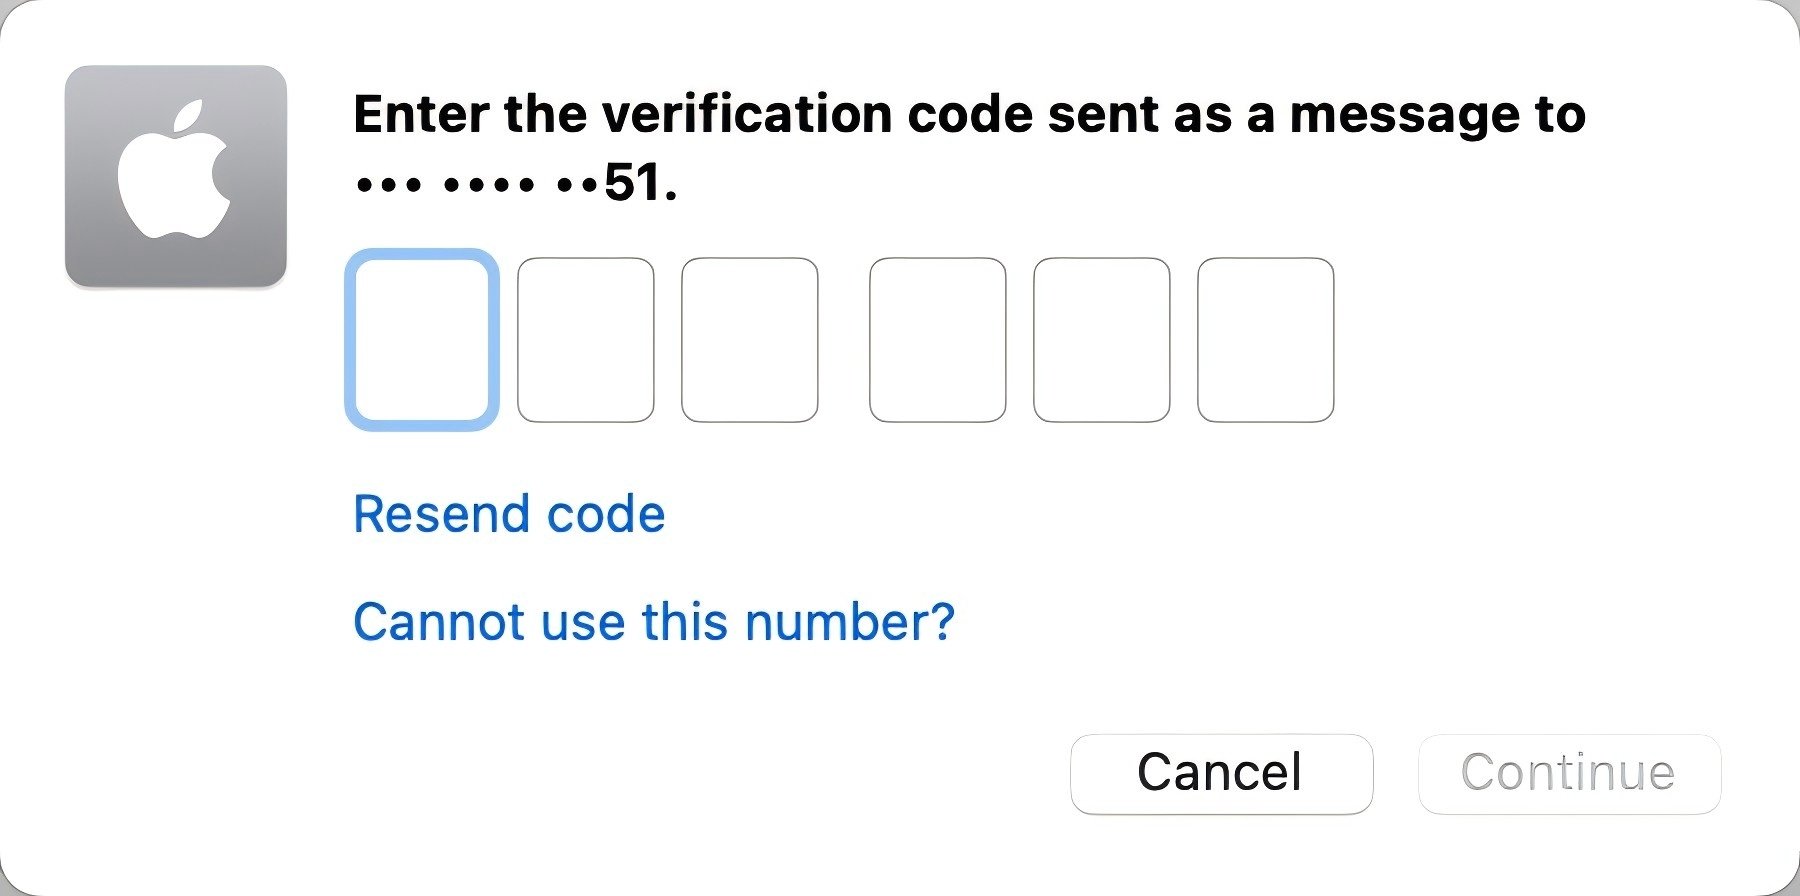
6. Then you might be required to enter a 6-digit verification code that is sent to a trusted device. Click Continue.
Your iCloud contacts will now appear in the Contacts app.
7. On your Mac, open the Numbers app. Create a new spreadsheet.
8. In the Contacts app, select the contacts you want to export:
To select all iCloud contacts, press the Command + A keys on the keyboard.
To select specific contacts, hold the Command key. Click on each iCloud contact individually.
9. Drag and drop the selected contacts from the Contacts app into the Numbers spreadsheet.
10. Edit the contacts information if needed. For example, you can delete some unwanted columns.
11. When everything looks good, go to the File menu in Numbers and choose: Export to > CSV.
Now your iCloud contacts are exported to a CSV file.
You can export iCloud contacts from iCloud.com and then converting the exported file to CSV format. While this method applies to both Windows and Mac. We recommend Mac users choose one of the first two methods, which will be more efficient.
In this method, you have to perform the whole process in two steps.
Below are the detailed steps:
1. Go to iCloud.com. Sign in with your Apple ID and password.
2. Choose Contacts from the main dashboard.
3. In the contacts list, press Command + A to select all your iCloud contacts. Or, hold the Command key to select only certain contacts.
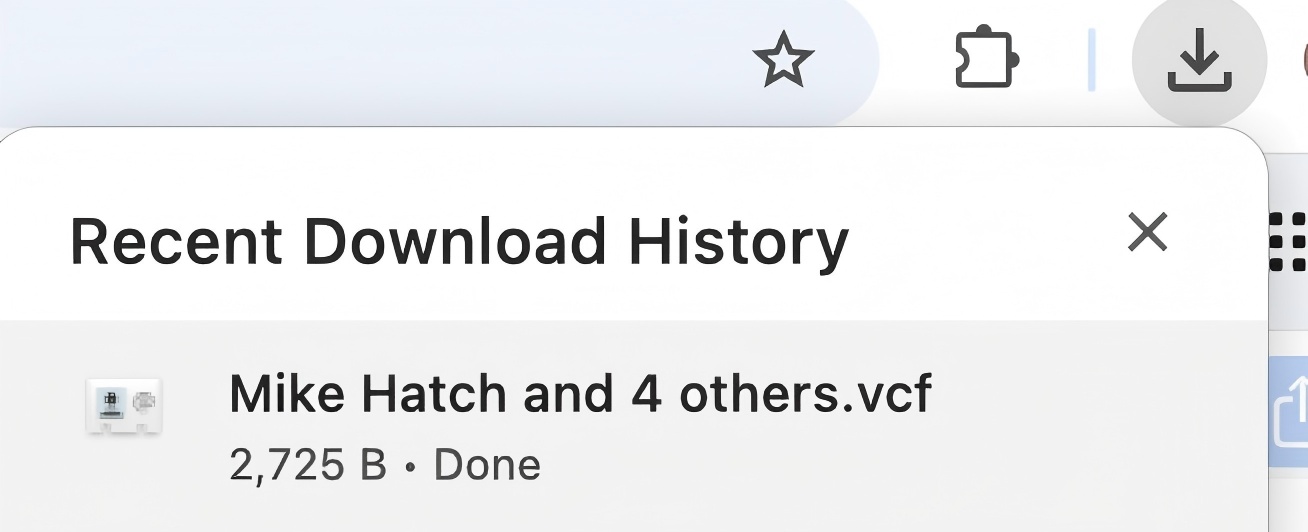
4. Click the Export icon in the upper right corner. Choose Export vCard.
![]()
Then your browser will download the selected iCloud contacts as a vCard file on your computer.
Tip: Some users might not be able to download vCard on iCloud. If you come across this situation, you can try changing your browser to Safari. Chrome or Internet Explorer may not work.
I also offer 2 ways to help you convert the downloaded file to CSV. The simple way is to use a VCF to CSV online converter. If you have a Gmail account, you can also use Google Contacts to convert.
1. Go to labs.brotherli.ch/vcfconvert, which is an online converter.
2. Click Choose File and upload the downloaded vCard.
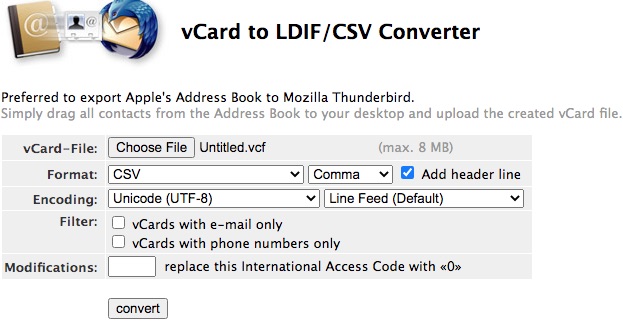
3. Click the Format dropdown list and choose CSV, Gmail (CSV) or FritzBox (CSV).
4. Click the next dropdown list and choose Comma.
5. Select the Add header line checkbox.
6. Click the convert button.
After the conversion, you will get a CSV file containing your iCloud contacts.
Tip: If you have a large contact list on your iCloud, the exported vCard file could be relatively large. If the file is bigger than 8 MB, then this vCard to CSV converter won’t work. In such a case, you can choose a different tool to do the conversion from vCard to CSV.
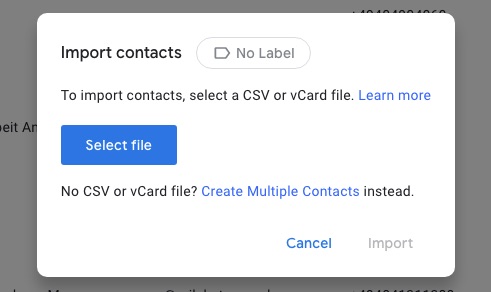
1. Navigate to Google Contacts and sign in to Google using your Gmail account.
2. On the left, click Import.
3. Click Select file and import the vCard file that contains your iCloud contacts.
4. Go back to the Google Contacts main window. Under Labels, select the iCloud contacts Group that you just imported.
5. Click the 3-dot icon on the upper right corner. Click Export. Choose export as Google CSV or Outlook CSV.
Tip: What’s the difference between Google CSV and Outlook CSV? In step 5, if you need to export your iCloud contacts to Outlook, then choose the option Outlook CSV. And you will find that the column headers in the CSV file are customized for Outlook. If you are to use the contacts with a Google service or app, then choose Google CSV. Regardless of the option you choose, the contacts information is the same. Only the column headers are different.
1. Before exporting, check your iCloud contacts information.
Before starting the export process, it’s a good idea to verify that all your contacts are properly synced and up to date. On Mac, you can go to System Settings to check the iCloud sync process. Then, preview your iCloud contacts in the Contacts app or iCloud website to see if the contacts information is complete.
Yes, the methods I mentioned in this article all supports selecting certain contacts to export. All you need to do is manually select a contact and hit the "Ctrl" key on your Windows keyboard or the "Command" key if you're using a Mac. Then select other contacts you want to export.
CSV is a common text file format that can be opened and edited in many applications including Microsoft Excel, Apple Numbers, Google Sheets, Notepad and most other text editors.
How do I export iCloud contacts to CSV file? All the three methods introduced in this article are easy to apply. If you want to use the quickest way, you can try the method with Cisdem ContactsMate. The contact manager used in the first method enables you to export contacts to CSV, Excel and other desired formats in a couple of clicks. It also provides other useful contact management solutions.

With a passion for tech and writing, Sarah joined Cisdem, where she focuses on creating articles about using utility tools to enhance file management and simplify contact management.


Amigos Casa
I was struggling to export my iCloud contacts on Windows PC, but this article made it so easy. The iCloud.com method is perfect.